How To Take Blue Sky Photos: Have you ever wondered how photographers take amazing blue sky photos? It’s not that difficult, really! How to take blue sky photos provide several tips to help you take amazing blue sky photos.

How To Take Blue Sky Photos
People often ask, “How can I get the best blue sky photos with my digital camera?
Most of us have seen some really amazing blue sky photos, but generally when we try for a blue sky photo, it seems the sky is more white (blown out) than blue.
At the end of the day, it really just comes down to the right information, the right equipment and the right conditions.
Once you have the information, equipment and conditions, all you need to do is practice. You will soon find out what works and what does not work.
When it comes to taking blue sky photos, I simply keep a few basic principles in mind.
1. Pick a Day With Perfect Conditions
In other words, pick a bright blue sky day. To start with, it is best to have favorable atmospheric conditions – a bright sunny day with minimal pollution (smog) and water vapor (fog).
Picking the right conditions is the first step toward taking awesome blue sky photos.

2. Choose the Right Time of Day
If you want to take a photograph in the western sky, then close to sunrise could be the best time of day. If you want to take a photograph in the eastern sky, then close to sunset could be the best time of day.
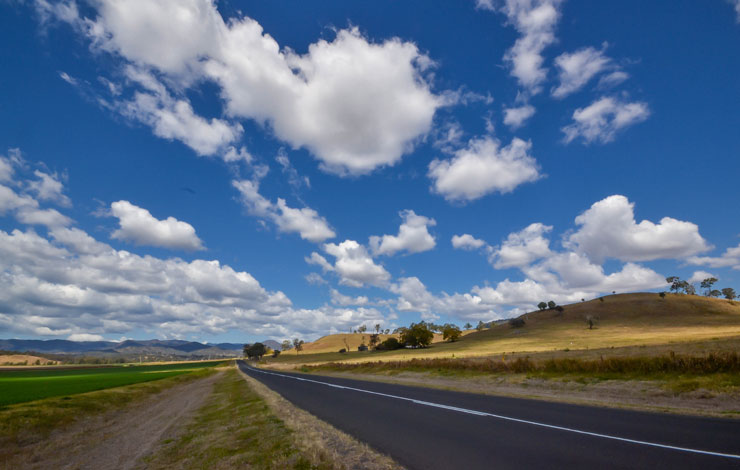
The general rule is: if you point your camera in the opposite direction of the rising or setting sun, you should find a deep blue sky. In the other parts of the day, you will need the sun slightly at your back to take a blue sky photo (see the image above – the sun is slightly at my back).
3. Use a Circular Polarizer
By putting a circular polarizing filter on the lens of your digital camera, you will deepen the color of a clear blue sky.
To keep it fairly simple, the circular polarizing filter changes the way your digital camera sees and treats light, especially reflections and glare.
With a circular polarizing filter, you simply spin the filter unto you get the best result.
However, there is a formula for the best blue sky position. Your best position to take a blue sky photo is 90 degrees from the sun. Take note of the following and you will never forget this rule. You can predict areas of maximum effect for polarizing filters by pointing your index finger at the sun with your thumb extended upward in ‘gun’ fashion. Then rotate your hand while your index finger continues to point at the sun. Anywhere your thumb points will be an area of maximum effect for a polarizing filter.
Let me sum it up by saying this: “A polarizing filter accentuates a blue sky only to the degree that its perpendicular (90 degrees) to the rays emanating from the sun, shooting perpendicular gives 100% effect whereas shooting parallel (into or away) gives 0%. If you shoot 45 degrees, then it will give you 50%.”
4. Use Graduated Neutral Density Filters
You can create a deeper blue sky with a graduated neutral density filter. These types of filters are also called split density filters.
Graduated neutral density filter are used to balance foreground and background exposure by reducing the amount of light transmitted through only a portion of the filter.
You can control the amount of light by simply moving the filter up or down manually by your hand.
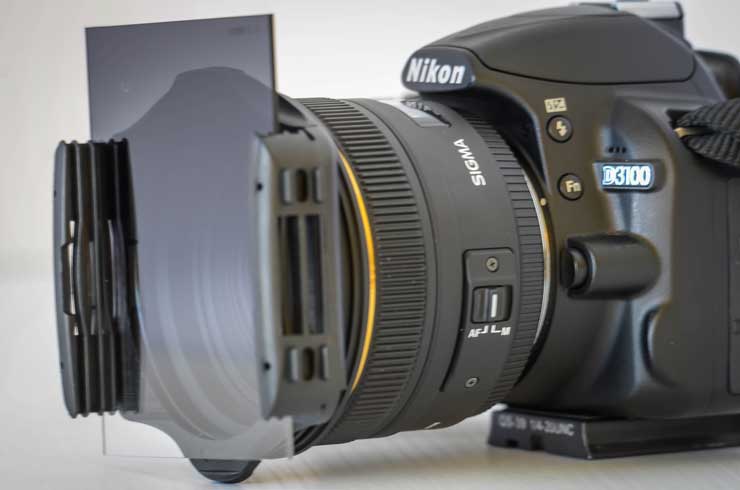
Graduated neutral density filters are usually attached to your camera lens with a filter holder (see image to your right). You can slide the filters up or down within the filter holder.
Once you built up a collection of graduated neutral density filters, it is a matter of choosing the right one for your photography situation. As I said before, when you have the information, equipment and conditions, it is simply a mater of practice, practice and more practice.

5. Use Photoshop To Enhance Colors
It is better to get the blue sky photo “in-camera” rather than “post-processing.” Nevertheless, you can still enhance the blue sky with Photoshop.
There are several ways you can do this. You can replace the sky with another sky photo (a bluer sky photo) or you can select the sky and make it bluer by enhancing the color.
6. Use Lightroom To Enhance Colors
Again it is better to get the blue sky photo “in-camera” so that you have the best image to work with in “post-processing.”
Once you have the blue sky photo, you can enhance the blue color of the sky in Adobe Lightroom using the light and color sliders or the linear gradients tool to get great blue sky photos.
7. Purchase Polarizing Filters
Amazon have a variety of polarizing filter for all you needs to take blue sky photos. To purchase or view these filters, just click on the following link – polarizing filters from Amazon. To access the filters on the Amazon webpage, just click on the filters link to your right.
